WebGPU Shader Toy
Product Info
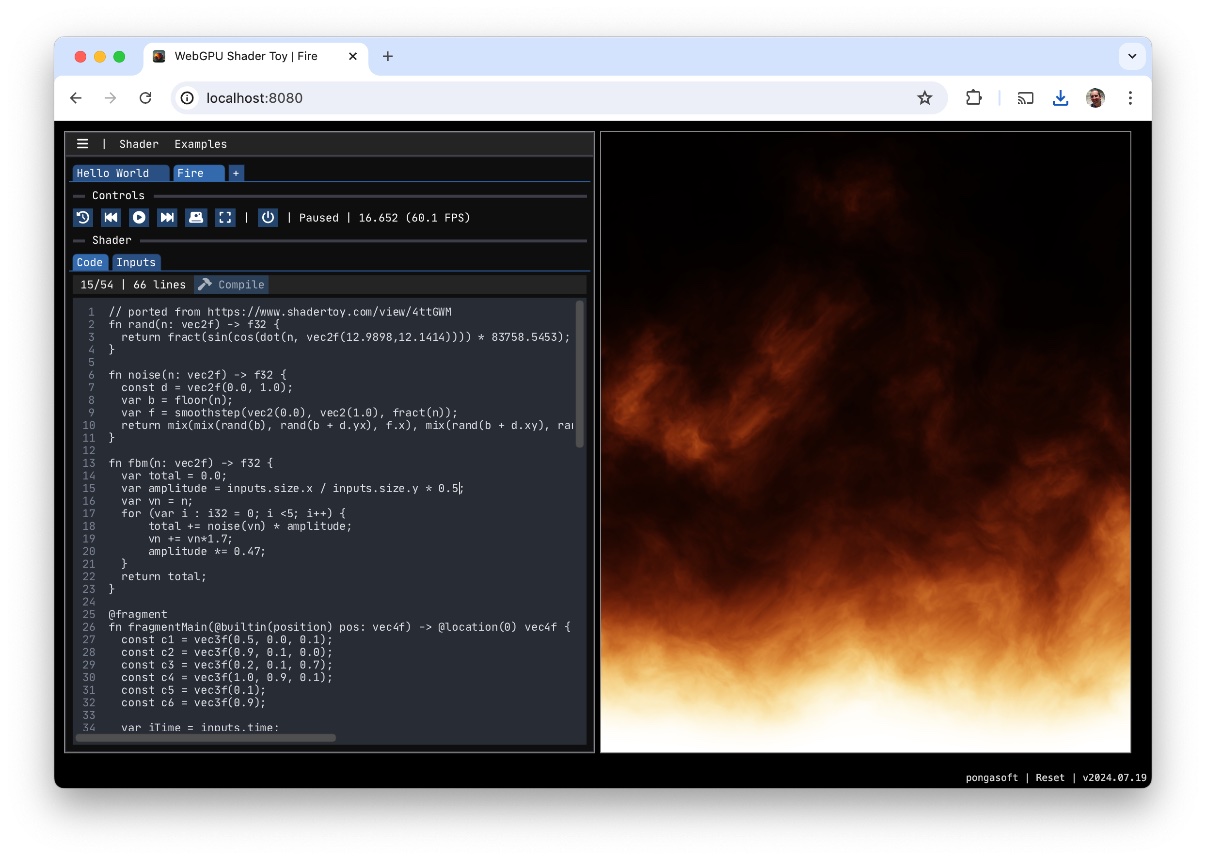
WebGPU Shader Toy is a free tool for experimenting with WebGPU fragment shaders and the WebGPU Shading Language (WGSL).Main Features
- Edit fragment shader code (WGSL) and compile for instant feedback
- Tabbed interface to work on multiple shaders
- Control time (forward / backward / reset)
- See value of inputs (ex: mouse position) live
- Take a screenshot
- Light/Dark style
- Manual/Automatic layout
- Drag and Drop
- Error handling
- Fullscreen support
- Hi/Low DPI support
- Automatically save full project
- Export/Import shaders
- Export/Import full project
- Free. No ads. No Tracking.
Run in your browser
WebGPU shader toy is an application that runs in your browser.
This tool requires a browser that supports WebGPU. At this time, Google Chrome and Microsoft Edge are working. Check this site for details.
Look & Feel
You can check a video of the tool on YouTube.
Usage
The tool is pretty self-explanatory and has a built-in help menu for shortcuts. Here are some details about certain specific topics.Browser environment
This tool runs in the browser and as a result is limited to the restrictions that are implemented in most web browsers. In particular:
- Being a WebAssembly tool, JavaScript is required and cannot run if JavaScript is disabled.
- The first time you paste from the clipboard, the browser should ask for your permission to do so. If you don't enable it, Paste will only be available within the tool itself (meaning you can Copy something from any shader loaded in the tool) and you won't be able to Paste anything from outside the tool.
- When toggling fullscreen, you might also have to enable it (depending on the browser)
- When exporting a file (project or shader), you can only control the name and not where to store it: the browser will store it in the folder you have selected for "Download".
Fragment Shader
The main goal of this tool is to write a fragment shader in WGSL similarly to the popular project Shadertoy.
The fragment shader sent to the GPU, looks like this:
// Begin WebGPU Shader Toy Header
struct ShaderToyInputs {
  size:  vec4f,
  mouse: vec4f,
  time:  f32,
  frame: i32,
};

@group(0) @binding(0) var<uniform> inputs: ShaderToyInputs;
// End WebGPU Shader Toy Header

// YOUR SHADER CODE GOES HERE
The example called
Tutorial was designed to explain how to write the shader code including how to use the inputs provided by the tool.
Storage
This tool runs in your browser and does not use any server. For persisting your work, it uses the localStorage API.
- The entire project is saved regularly as well as when the page is navigated away: if you come back later on, you will be back to where you left of.
- You can export the project in its entirety: this will download a JSON file that you can later on reimport (or drag and drop). You can use the "Quick Export" shortcut to frequently save your project to disk: since the browser downloads the project with the same name, it automatically appends a version number to it. To change the name, use the "Export" menu to enter a new name.
- You can export a single shader file (only the content will be exported) that you can later on reimport (or drag and drop).
Since this tool does not have a server component, you can export the project and save it on a shared folder (like Google Drive) so that you can import it on a different machine.
Selecting
Reset, either in the main menu or at the bottom of the page, deletes the storage entirely. Make sure you export the project before doing so!
Drag and Drop
You can drag and drop either a shader file (wgsl) or a (json) project file (previously exported) anywhere in the window (as you hover above the area, it will get highlighted)Main Keyboard shortcuts
| Shortcut (macOS) | Shortcut (other) | Description |
|---|---|---|
| Cmd + D | Ctrl + D | Compile the shader |
| Cmd + A | Ctrl + A | Select All |
| Cmd + C | Ctrl + C | Copy selection / Copy Line (no selection) |
| Cmd + X | Ctrl + X | Cut selection / Cut Line (no selection) |
| Cmd + V | Ctrl + V | Paste |
| Cmd + Z | Ctrl + Z | Undo |
| Cmd + Shift + Z | Ctrl + Shift + Z | Redo |
| Cmd + F | Ctrl + F | Find |
| Cmd + [ or ] | Ctrl + [ or ] | Indentation change |
| Cmd + / | Ctrl + / | Toggle line comment |
| Cmd + S | Ctrl + S | Quick Export (disk) |
| Home or End | Beginning or End of line | |
| <Nav. Key> | Arrows, Home, End, PgUp, PgDn: move cursor | |
| Shift + <Nav. Key> | Select text | |
| Shift + Alt + <Nav. Key Right or Left> | Shift + Ctrl + <Nav. Key Right or Left> | Select the next word |
| Shift + Ctrl + <Nav. Key Right or Left> | Shift + Alt + <Nav. Key Right or Left> | Select the text within the enclosing brackets |
Screenshot
You can take screenshots of the currently rendered shader:
- : takes a screenshot instantly, using the default or previously used settings
- : open a window to choose the filename and image settings (this icon is enabled when holding the
Altkey)
Fullscreen
You can render the shader in fullscreen mode:
- : resize the shader to occupy the entire screen
- : maintain the current shader window size/ratio (this icon is enabled when holding the
Altkey)
Layout
The tool offers two different layouts:
- In
Automaticlayout, the two panes fill the browser window. To resize the panes, resize the browser window. The space in between the two panes can be clicked and dragged to resize each pane proportionally. Double-clicking on this space will split the two panes evenly again. - In
Manuallayout, each pane has a little handle at the bottom right which allows each pane to be resized independently.
Resolution
The tool lets you toggle between Hi DPI / Low DPI. If you are having issues with the framerate, consider switching to Low DPI.
The input
inputs.size.w (resp. inputs.size.z) represents the scaling factor along the x-axis (resp. y-axis). Because of the environment this code is running in (a browser), both values will always be equal. When there is no scaling (Low DPI), it will be 1.0. When there is scaling, it will be > 1.0. For example, on a retina display it could be 2.0. On a Windows machine with 175% scaling, it will be 1.75.
Note that this setting only works if the monitor supports Hi DPI: the true meaning of this setting is "Hi DPI Aware".
History
You can undo/redo edits in the shader editor by using the standard shortcuts or using the Undo/Redo menu entries from the Shader menu.
The History menu lets you Undo/Redo changes made at Shader levels, like adding a new shader or closing one.
Enabling/Disabling Rendering
The editor and the shader rendering panes share the same GPU rendering loop. A drastic drop in the framerate, due to complex shader code, can cause the editor to become sluggish and less responsive. By turning off the rendering, the editor's responsiveness can be improved, making it easier to edit the code efficiently.Sponsor
pongasoft produces a variety of high-quality and free/open source software. If you would like to support my work and help offset the cost of development tools, web hosting, etc., here is how to do so:
- Tip via Ko-fi
- Send money via PayPal
News
2026-06-11
Pushed WebGPU Shader Toy update: v2026.06.11
- Added a new code option to show/hide line folding
- Added a new code option to show/hide the code minimap
- Added a new code option to automatically wrap if the line is too long (word wrap)
Run the new version
2026-04-25
Pushed WebGPU Shader Toy update: v2026.04.25
- Replaced the implementation of the editor with a more updated version.
Thanks to Johan Goossens for taking on the massive effort of rewriting the editor from scratch.
- This change adds many new features, amongst them:
- Syntax highlighting (which can be turned off via a setting)
- Search and replace
- Multiple cursors
- Check the ImGuiColorTextEdit repo for more details.
- Note that as a “negative” side effect, some shortcuts (like Ctrl+A / Ctrl+E for Home/End) are no longer available.
- This change adds many new features, amongst them:
Run the new version
2026-02-04
- The project has been moved to Codeberg.
2026-01-31
Pushed WebGPU Shader Toy update: v2026.01.31
- Fixes #8: Render loop possibly does not pause when app is unfocused
- Although the main loop was not being called when switching tabs, the clock would still run
- Also enforces that the main loop does not run in the event that it gets called
Run the new version
2026-01-15
Pushed WebGPU Shader Toy update: v2026.01.15
- Fixes #5: crash when the shader is missing the
fragmentMainentry function - Error messages are now easier to read (no more horizontal scrolling)
Run the new version