RE Edit
Product Info
RE Edit is a free and open source WYSIWYG editor for the UI of a Rack Extension, or in other words, a graphical editor forhdgui_2D.lua and device_2D.lua. Although the tool is currently limited to the UI only, it is already extremely useful and depending on feedback, it may be expanded, at a later date, to allow supporting editing ALL configuration files (motherboard_def.lua, display.lua, etc...).
Main Features
- Load the Rack Extension UI (
hdgui_2D.luaanddevice_2D.lua) as well as the Rack Extension definition (info.luaandmotherboard_def.luadue to its integration with re-mock) - Allow to visually edit the device look and feel including adding/deleting widgets
- Show an error icon when a widget has errors (ex: missing required property, wrong number of frames, out of bound, etc...)
- Show a user friendly error message when an issue is detected in lua to make it easier to track the problem
- Handle all widget types
- Handle decals (like screws, holes, etc...)
- Undo/Redo (with timeline display)
- Grid (for constrained movement)
- X-Ray rendering (show transparent widget to align with background)
- Handle visibility in a friendly manner: special window dedicated to see wich widget is part of which visibility group + drag & drop to add (or change) the visibility of a widget
- Save the changes (which saves
hdgui_2D.luaanddevice_2D.lua) - Generate
GUI2D/gui_2D.cmakefor integration with CMake (simply include in your project) - Import images (png) directly from RE Edit (single or multiple images)
- Edit images on the fly: resize, tint, brightness, color, contrast, and flip (horizontal/vertical)
- Support all built-in images (like cv socket, audio socket, etc...) so no need to manually import them
- Detect changes in the device and reload dynamically (on demand)
- Handle Custom Display SD/HD
- Handle 4K display
- Windows 10+ and macOS 10.15+ (Intel/M1 support)
Look & Feel
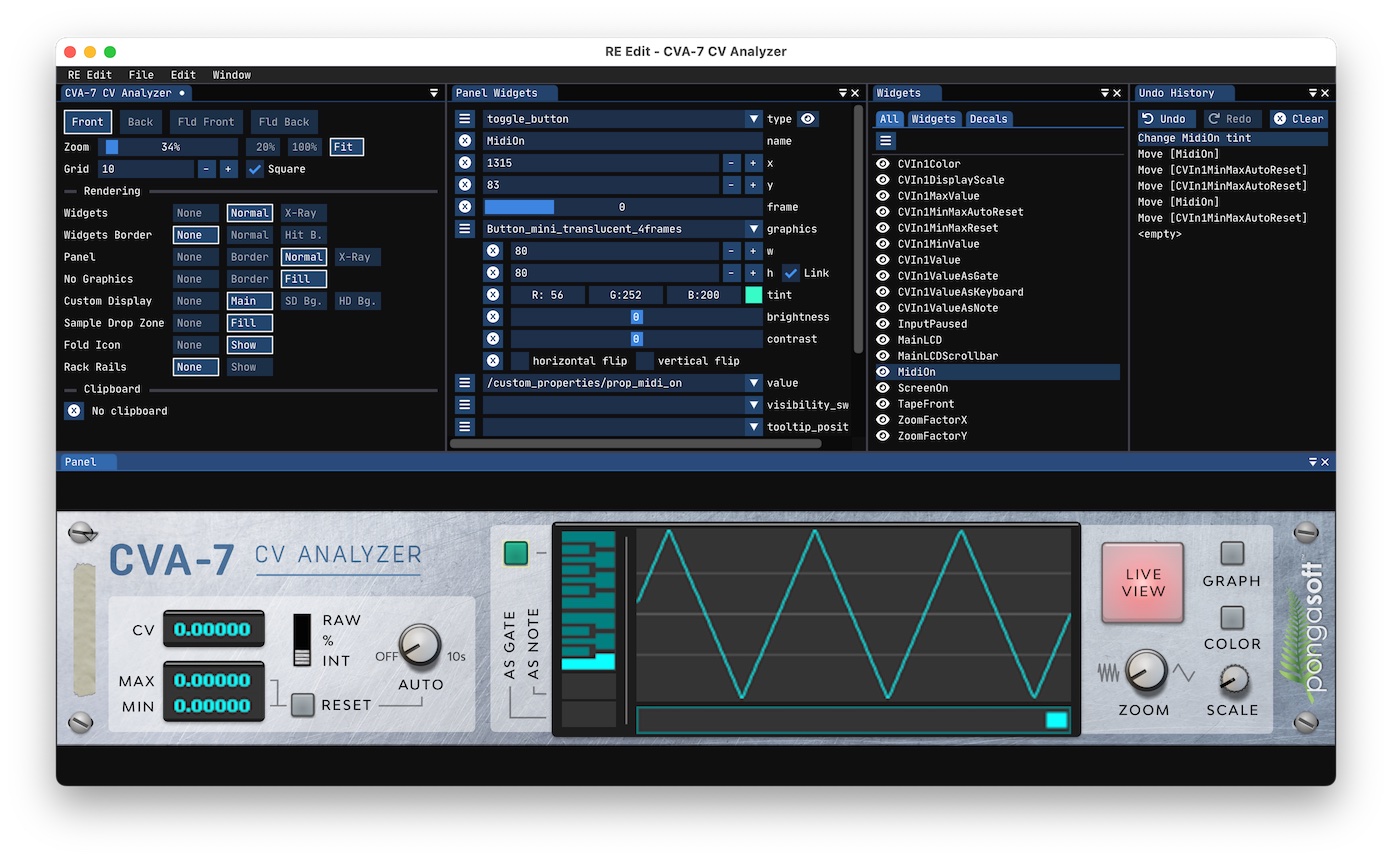
Dark Style
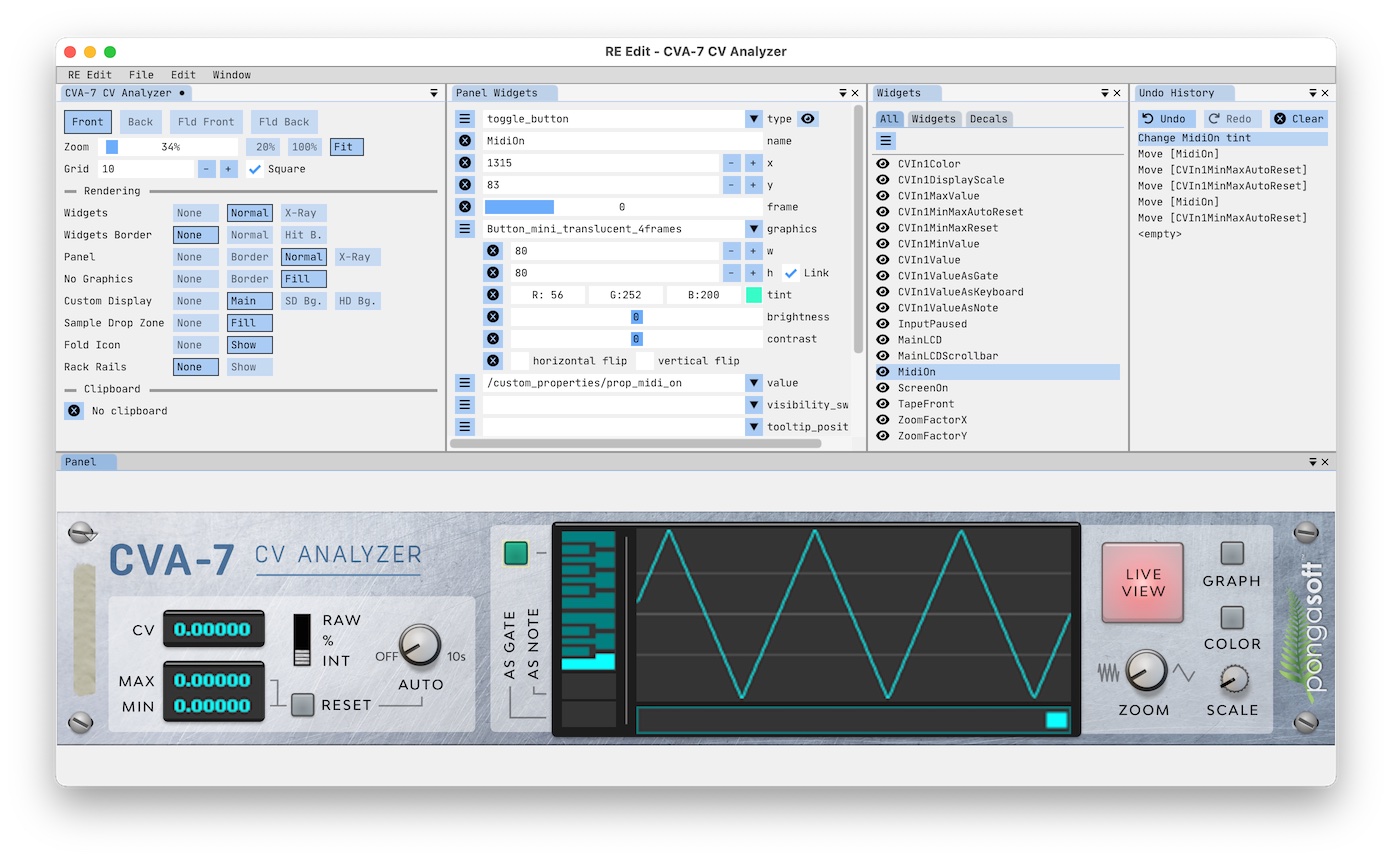
Light Style
Download
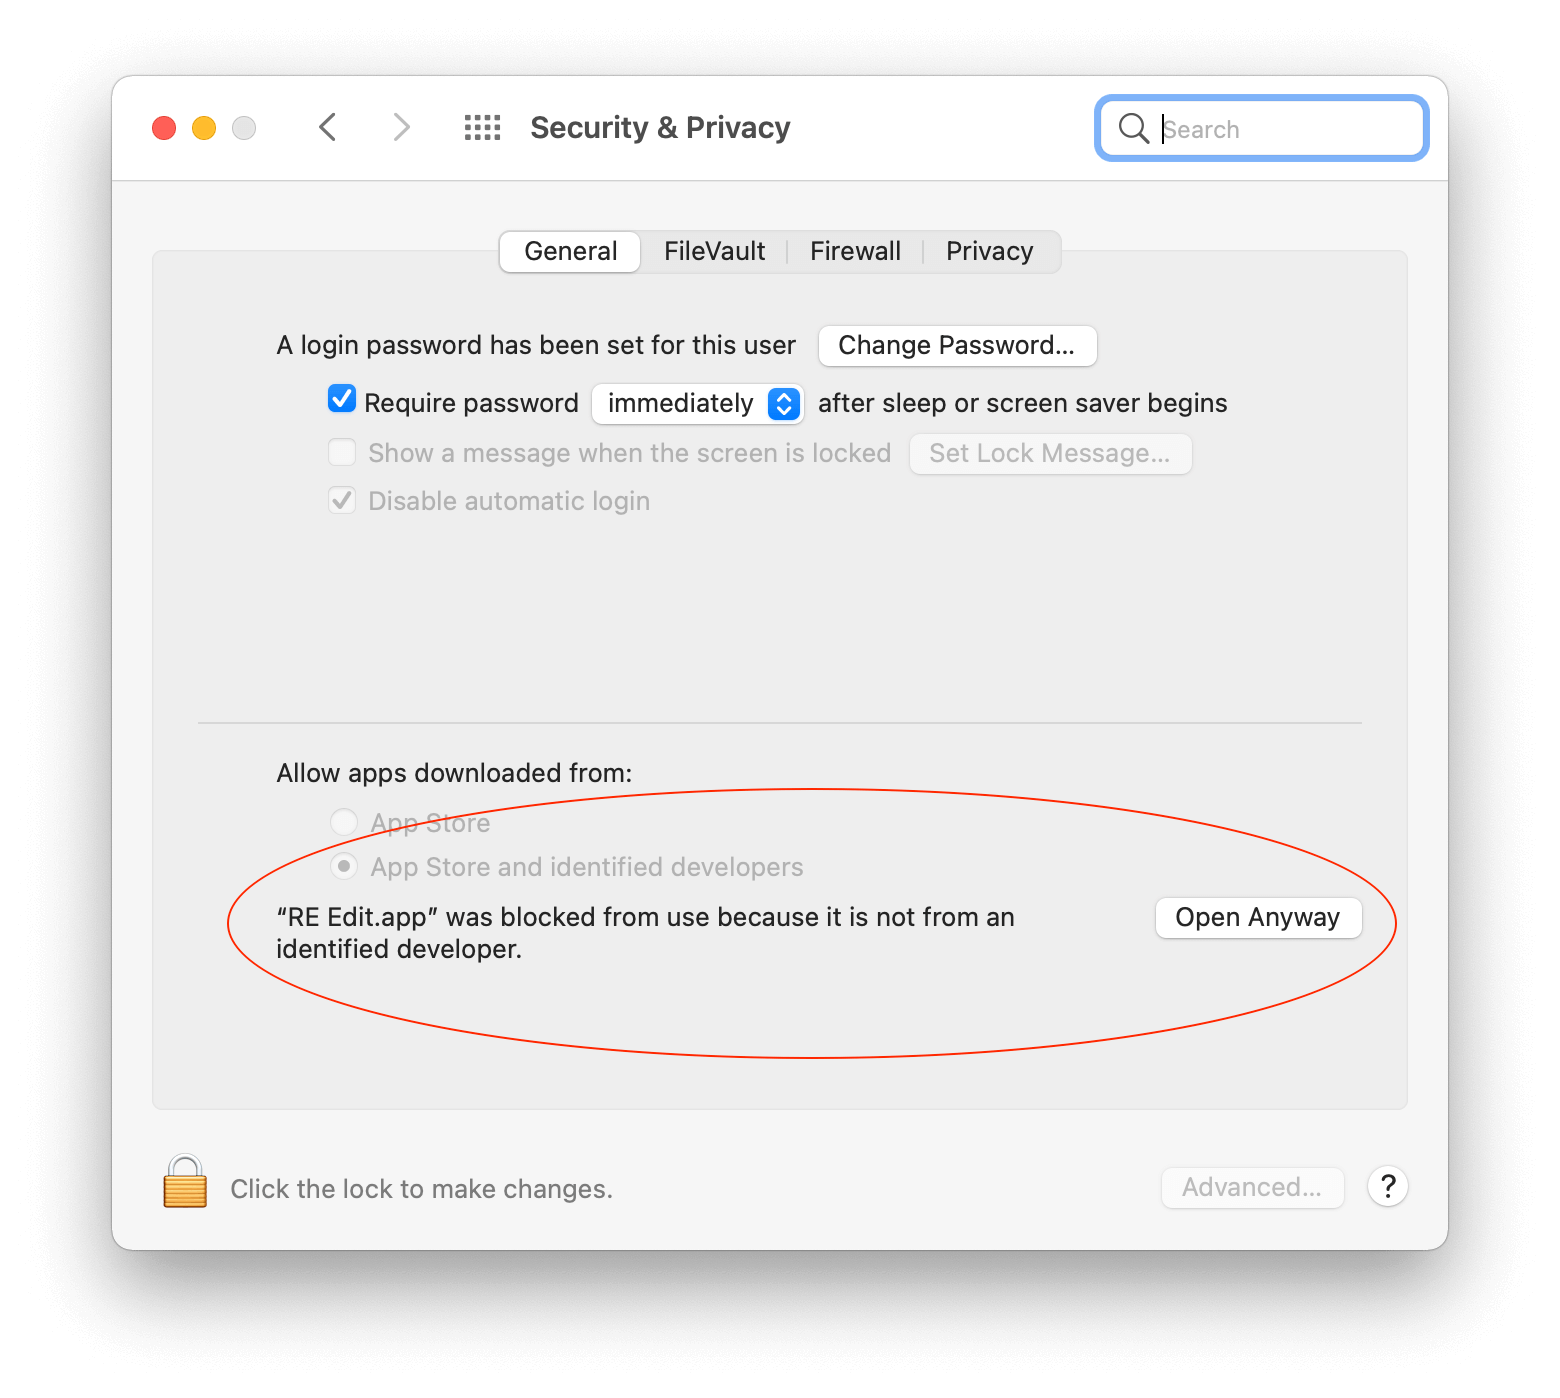
Select the download file according to your architecture (direct links). Select "Older Versions" to view the list of versions available.macOS Installation
- (Optional): Check that the checksum (sha256) matches
458375a15d4a59cdd059c00f53449c4a62a0fdad1e11a6208e90af3ed40b967e - Double click on the disk image to open it
- Drag and Drop "RE Edit" into the Applications folder
- To uninstall, simply drag "RE Edit" to the trash
Windows Installation
- (Optional): Check that the checksum (sha256) matches
22ff454614f8c6ba4426b4149e1b5f29d879559fae9247c9b3e3b0cb911ad856 - Double click on the msi executable to install it
- The executable can be found under
C:\Program Files\pongasoft(if you keep the default install directory) as well as in the startup menu under thepongasoftfolder - To uninstall, go to the "Add or Remove program" Windows panel and uninstall it from there
Usage
In the following documentation LMB (resp. RMB) means clicking with the left (resp. right) mouse button.General
- This icon represents a "Reset" action
- This icon represents a popup menu (more than one action available) when using LMB
- This icon shows the current visibility of the wiget (whether it is rendered or not in the Panel window). This icon is (LMB) clickable to toggle between show and hide (this overrides any visibility property settings). To quickly revert to the default visibility property for all widgets, select "Reset Visibility" in the panel menu.
- This icon shows that there is an issue with a property/widget. Hovering the mouse over this icon, will show what kind of error it is
Visibility
- The Reason SDK has the concept of visibility driven by 2 attributes:
visibility_switchandvisibility_valuesfor some widget types. - RE Edit uses these attributes to determine whether a widget is visible or not at the moment. When a widget is visible, it is rendered in the "Panel" window. Otherwise it is not rendered.
- Visibility is represented by 2 icons (full brightness means the widget is visible, half brightness means it is hidden):
- represent the "regular" visibility state, driven by a property if the widget supports it or just visible otherwise
- represent the visibility state when it has been manually overriden (manual override lasts until it is reset)
- This icons also serve as a toggle:
- to manually override the visibility state as defined by the visibility attributes
- to show/hide a widget in the event that this type of widget does not have these attributes (for example a decal)
- The "Properties" window displays all the visibility properties currently used by the device and allow to quickly change the value of these properties to show/hide multiple widgets at a time.
- In order to revert all widgets to use the default behavior (driven by visibility property), simply select the "Revert Visibility" menu entry of the Panel itself.
Keyboard
| macOS | Windows | Description |
|---|---|---|
| ⌘ = | Ctrl + = | Increment zoom (+10%) |
| ⌘ - | Ctrl + - | Decrement zoom (-10%) |
| ⌘ 0 | Ctrl + 0 | Zoom to fit |
| ⌘ Z | Ctrl + Z | Undo |
| ⌘ ⇧ Z | Ctrl + Shift + Z | Redo |
| ⌘ S | Ctrl + S | Save |
| ⌘ Q | Ctrl + Q | Quit |
| Ctrl + Mouse Click | Ctrl + Mouse Click | Increases (resp. decreases) by the size of the grid when clicking on "+" (resp. "-") for position and size |
| Alt | Alt |
|
| Arrows | Arrows | Move the panel |
| Space Bar + LMB | Space Bar + LMB | Move the panel (when mouse is over the panel) |
| Mouse Wheel | Mouse Wheel | Zoom in/out (when mouse is over the Panel) |
| A | A | Toggle Select All/Select None |
| B | B | Toggle Widget Borders |
| C | C | Center the panel |
| F | F | Zoom to fit (one hand shortcut ;) |
| Q | Q | Quick View (while being held) |
| R | R | Toggle Rails (also toggle Panel X-Ray to see the rails) |
| X | X | Toggle Widget X-Ray |
Copy/Paste
Copy/Paste is available via popup menus only (no keyboard shortcut at this time):
Source (Copy) Target (Paste) A single widget (copies all attributes)
A single widget attribute value
Selected widgets
Quick View
Quick View is achieved by holding theQ key while hovering some items. One way to think about it is "tooltip on demand":
- When hovering above a widget on the Panel
- When hovering above a widget name in the "Widgets" window
- When hovering above a property path
- When hovering above a graphics attribute
- When hovering above a graphics in a list (menu items and dropdowns)
- When hovering above an entry in the "Open Recent" submenu
Effects
NEW 1.6.0 RE Edit lets you apply a few effects to any graphics: resize, tint, brightness, contrast, and flip (horizontal/vertical).
- While using RE Edit, the effects are implemented as a custom GPU shader, thus ensuring high performance when editing
- When the project is saved, RE Edit generates a new image with all the effects applied to it. The new image name is computed from the original image name with the effects encoded in the name (ex:
Button_71_TEEB8FF_Y_S200x213_4frameswhere tint, flip vertical and resize have been applied) - The entry in
device_2D.luarecords both the original image and all effects as well as the new image. Ex:-- Example (decal) front[6] = { offset = { 2260, 50 }, { path = "Button_71_S200x213_4frames", frames = 4, -- used by RE2DRender re_edit_path = "Button_71_4frames", re_edit_size = { 200, 213 } -- used by RE Edit } } -- panel_decal_16 - RE2DRender simply uses the new image (
Button_71_S200x213_4framesin this abbreviated example) and ignores there-edit-*attributes, so when deploying the device in Recon or uploading to the Reason servers, you get the actual image with all effects applied - RE Edit uses the
re-edit-*attributes to be able to reinstantiate the project in the exact same state it was when you saved it and continue where you left of, including, for example, resetting all effects.If you want to benefit from the effects feature but you don't want to keep there-edit-*entries, you can select the "Commit All Effects" menu entry (either at the widget level, or for the whole project). This will effectively applies the effects permanently. But note that the next time you open the project, you won't be able to undo the effects previously applied and if you apply new effects, they will be applied on top of the image with effects, not the original image.
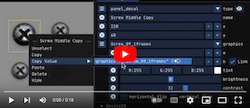
How to apply the same effects to multiple widgets?
- Edit a single widget and apply all the effects you want
- Copy the "graphics" value (for example by right-clicking on the widget and selecting Value/graphics (ex:
graphics="Button_71_4frames ()") - Select all the widgets you want to apply the effects to, right-click and select Paste
Layout
RE Edit uses ImGui dock space which allow for having each window either free floating or docked. As you move a window around (by LMB dragging it from its title bar) you will see docking icons to let you tailor the UI to your own needs. By default, all windows are docked in a sensible location. Feel free to rearrange (it is automatically saved with the preferences for the rack extension under edit).Use Window/Horizontal Layout or Window/Vertical Layout menus to revert to the default built-in layouts.
Main Window
The main window (named after the Rack Extension under edit) has several sections:
- Tabs to switch between the 4 different views of the device (note that Note Players only have 2 views)
- zoom: Changes the zoom level of the panel rendering
- grid: Defines a movement constraint grid: when you move a widget around, it will move by the amount specified. To disable the grid entirely, set its size to 1. To disable the grid temporarily press the Alt key while you move widgets around.
- Widgets: how all widgets are rendered
None widgets are not rendered at all (can be useful for example combined with Border/Normal) Normal widgets are rendered at full opacity X-Ray widgets are rendered at reduced opacity which makes them transparent (perfect to see the background below for better alignment purposes) - Widgets Border: how the border of all widgets is rendered
None no border is rendered Normal the border (aka bounding box) is shown Hit B. the hit boundaries of the widgets are shown instead. Selecting this option adds a section in the Attribute/Graphics section to modify it - Panel: how the panel (background) is rendered
None panel is not rendered at all Border just the outline of the panel Normal panel is rendered at full opacity X-Ray panel is rendered at reduced opacity which makes it transparent (can be very useful to see the rails below in order to align screws, etc...) - No Graphics: how a widget defined by its size only is rendered (no image)
None not rendered Border an empty rectangle Fill a filled rectangle - Custom Display: lets you change how custom displays are rendered
None not rendered Main the "main" image (as defined by the "graphics" attribute) SD Bg. the low resolution graphics if provided/available ("background" attribute) HD Bg. the high resolution graphics if provided/available ("background" attribute) - Sample Drop Zone: lets you change how sample drop zone are rendered
None not rendered Fill a filled rectangle - Fold Icon: the icon rendered in the Reason UI to fold/unfold the device (not available for players since players are not foldable)
None not rendered Show show the fold icon - Rack Rails: the same rails that are rendered in the Reason UI
None not rendered Show show the rails (since they are rendered below the panel, to really see them you might need to use X-Ray toggle for the panel rendering)
Panel
Panel window is the primary window which renders the device with all the widgets
- As mentioned previously, the zoom level of this panel is controlled in the main window
- LMB Clicking on a widget, selects it and displays its information in the Panel Widgets window.
- LMB Dragging on a widget lets you move the widget to a different location
- LMB Clicking outside any widget selects the Panel itself
- LMB Dragging outside any widget lets you move the Panel around freely
- Space Bar + LMB Move the Panel around freely (particularly useful in the event that there is a widget under the mouse since clicking on a widget selects it)
- Shift + LMB Clicking lets you extend the selection to multiple widgets by drawing a rectangle
- Command + LMB Clicking (macOS) or CTRL + LMB Clicking (Windows), selects/unselects multiple widgets (same shortcut as the file selection in the macOS Finder/ Windows Explorer window)
- RMB Clicking on a widget or outside any widget brings up a popup menu with various actions like adding another widget
Panel Widgets
This window displays the currently selected widget(s). If no widget is selected, it displays the panel itself. If 1 widget is selected, it displays information about this widget. If more than 1 widget is selected, it lets you move them all at once (achievable by dragging in the Panel window as well) and aligning them.
Widgets
This window has 3 tabs:
- The "All" tab show all the widgets and decals for this panel sorted by name.
- The "Widgets" tab show only the widgets sorted by the order in which they are defined in
hdgui_2D.lua. This represents the Z-order (widgets at the bottoms are rendered before widgets at the top). - The "Decals" tab show only the decals sorted by the order in which they are defined in
device_2D.lua. This represents the Z-order (decals at the bottoms are rendered before decals at the top). Note that decals are always rendered below any widget. If you want an image on top a widget, you need to use astatic_decoration.
Each tab shows a set of names that can be interacted with:
- LMB Clicking on a widget name, selects it and displays its information in the Panel Widgets window.
- RMB Clicking on a widget name, brings up a popup menu with various actions possible (including a shortcut to show the widget if it is hidden)
- Clicking (LMB) on the icon toggles the visibility of the widget (see Visibility section).
- Command + LMB Clicking (macOS) or CTRL + LMB Clicking (Windows), selects/unselects multiple widgets (same shortcut as the file selection in the macOS Finder / Windows Explorer window)
- Shift + LMB Clicking selects the range of widgets between the last 2 clicks (same shortcut as the file selection in the macOS Finder window)
- LMB dragging on a widget name lets you drop it on a visibility group to quickly and easily add a visibility property/value to the widget
- Clicking on or ("Widgts"/"Decals" tabs only) lets you change the order in which widgets are rendered (and represents the order in the
hdgui_2D.luafile). Since widgets are not allowed to overlap, it is only important forstatic_decorationwhich can be rendered above or below another widget
Properties
This window displays all the visibility properties used by all the widgets in the current panel. There are 2 tabs:
- The "Compact" tab renders a slider for each visibility property and lets you change the value of the property by dragging the slider. When the slider changes it automatically displays the widgets associated to the new value.
- The "Expanded" tab renders a separate entry for each value of each visibility property. Selecting the value itself immediately changes the value of the underlying property thus making the current group visible and hiding the others.
You can drag and drop widgets (by click draggin on their names not their visual representation in the panel) to automatically set them to any visibility group in this window. If you use the Alt keyboard key when you drop the widget, it will add (instead of set) the value (this corresponds to adding an entry to the visibility_values attribute).
Decals
Rack extensions can have "anonymous" nodes in device_2D.lua. These nodes simply get composited during the
render2D phase into the background image. RE Edit calls these nodes "decals" and let you name them.
Sponsor
pongasoft produces a variety of high-quality and free/open source software. If you would like to support my work and help offset the cost of development tools, web hosting, etc., here is how to do so:
- Tip via Ko-fi
- Send money via PayPal
News
- The project has been moved to Codeberg.
- The code has been updated to check for new releases on Codeberg but since there are no new features, there is no need for a new version.
Released RE Edit update: 1.6.4:
- Added support for
device_categorieswhich was added as a new requirement to Reason 13
Released 1.6.3:
- Fixed issue with contrast not being saved
Older News
1.6.2 - 2023/08/28
- Added "Commit All Effects", at the widget level as well as at the global level, to be able to remove all
re_edit_*entries fromdevice_2D.luaonce the effects are applied (permanent/no more undo) - Added concept of notifications to inform the user of important messages
- Fixed instances where RE Edit would generate duplicate names
- Some performance improvements (textures are removed from the GPU when deleted)
1.6.1 - 2023/08/20
- Use a button (rather than a menu) for resizing the panel
- Added "Show Performance" menu entry to always show (resp. hide) the performance
- Added new icons, especially for widget visibility to make it clear that the user has manually changed it
- Fixed "Escape key" closes the application
1.6.0 - 2023/08/13
- Added "light" image editing/effects: resize, tint, brightness, contrast and flip (horizontal and vertical
- all effects are done live on the GPU
- when the project is saved a new image with the effects applied is generated
- "device_2D.lua" uses this image so that it works with Render2D
- "device_2D.lua" also stores which original image + effects were used so that when reloaded in RE Edit, it works as well
- Added a menu entry "File/Delete unused images" to figure out which images (under GUI2D) are used by the project and which ones are not
- Added a performance menu to tweak the frame rate
- Use `Alt` key to disable most filters (used when selecting images or properties in drop down lists)
- Internally, massive refactoring of the code to use raylib as the backend for ImGui:
- much more common code between Windows and macOS
- using custom OpenGL shader (for effects on GPU)
- generate the panel (using raylib + custom shader) into a texture to be rendered as an image in ImGui
1.5.0 - 2023/05/22
- Added ability to drag and drop image(s) (png) from the Finder (resp. File Explorer) onto the main window to import them
- Use grid when adding widgets/decals
- Turned "Add Decal" into a menu showing the list of all graphics (since a decal is nothing more than a graphic)
- Shows the image in Quick View for graphics
- Added Quick View in lists of graphics (menu lists and dropdowns) to easily and quickly be able to pick the right graphic
1.4.2 - 2023/05/15
- Added Help menu: displays the keyboard shortcuts
- Uses re-mock 1.4.3 which means re-edit can be built without depending on the RE SDK
1.4.1 - 2023/05/07
- Added ability to load a project by simply dragging it from the Finder (resp. File Explorer) onto the main window
- Disable saving preferences when there are multiple instances running (to avoid conflicts)
- Fixed visibility property type and owner
1.4.0 - 2023/02/20
- Implemented Undo History / Timeline (quickly undo/redo multiple operations)
- Easily show/hide a widget even if there is no visibility property defined ( icon)
- Added an "All" widgets tab in the Widgets window (in this tab, widgets are sorted by name). The "Widgets" and "Decals" tab remain the same and are sorted by Z-order (this is where you would go to change their respective orders).
- Major redesign of the "Properties" window to only show visibility properties currently in use
- Implemented "drag and drop" to easily add a widget to a visibility group (use Alt key to add to multiple groups): drag a widget from the Widgets window and drop onto a group in the Properties window (drag and drop also works from within the Properties window itself).
- Internal complete redesign of the Undo layer to be more flexible and allow "timeline"
1.3.0 - 2023/01/31
- Implemented Copy/Paste for bulk editing/changes
- You can copy a single widget (copies all attributes), and it can be pasted into:
- any panel where the type of the widget is allowed => duplicates the widget
- another widget => copy all (possible) attributes to the widget
- selected widgets => copy all (possible) attributes to all selected widgets
- You can copy a single widget attribute value, and it can be pasted into:
- another widget => copy this attribute to the widget (if possible)
- selected widgets => copy this attribute to the selected widgets (if possible)
- You can copy the selected widgets, and it can be pasted into:
- any panel where the type of the widgets is allowed => duplicates the widgets
- You can copy a single widget (copies all attributes), and it can be pasted into:
- Removed "Duplicate Widget(s)" menu entry since it is redundant with copy/paste (duplicate only allowed duplication on the same panel, copy/paste does not have this restriction)
- Added Select All/Select By Type menu entries (use
Altto include hidden widgets) - Simplified popup menu on Panel (added Widgets submenu instead of multiple menu entries)
- Added
Akeyboard shortcut to toggle between Select All/Select None - Added
Qkeyboard shortcut to show a Quick View (while the key is being held). Essentially a tooltip on demand:- When hovering above a widget on the Panel
- When hovering above a widget name in the "Widgets" window
- When hovering above a property path
- When hovering above a graphics attribute
- When hovering above an entry in the "Open Recent" submenu
- Shift + click now also selects the widget under the mouse pointer (no need to move)
- Added more visible error icon in the tab bar
- Moved the notification section up to be sure it is always visible
- Various UI tweaks
- Fixed some issue with Undo/Redo
1.2.1 - 2023/01/22
- Fixed application name on macOS
- Fixed trackpad and mouse wheel sensitivity issue when zooming in/out
1.2.0 - 2023/01/20
- Major redesign of the panel:
- no more scrollbars
- input shortcuts
- click + drag to move freely (or space + click + drag if on top of a widget to disable selecting the widget)
- arrows to move the panel
- mouse wheel to zoom in/out (zoom focus point is wherever the mouse pointer is)
Xto toggle Widget X-RayFfor Zoom to fitCfor Center panelBto toggle Widget bordersRto toggle Rails (+ panel X-Ray to see them)
- added "Clear Recent List" menu entry
- fixed crash on redo
- fixed improper error reporting when moving multiple widgets
1.1.0 - 2023/01/12
- Added Fold Icon / Rack Rails (thanks to @jengstrom at Reason Studios for the icons)
- Added Panel rendering (None / Border / Normal / X-Ray) (for example, to see the rails)
- Changed zoom to be common to all panels and added Zoom to Fit (now defaults when device opens)
- Added keyboard shortcuts (Save, Undo/Redo, Zoom In/Out/Fit, Quit)
- Fixes #1: RE Edit fails to load nested decals
- Fixes #2: Decals are not rendered properly
- Some minor performance improvements
1.0.0 - 2023/01/02
- First release.